


If you’re new to Studio, or even if you’ve been with us for years, there are some helpful tricks to set yourself up for success when designing in an external application like Photoshop, Illustrator, or Sketch. Below are some of these best practices to keep in mind!
Where to start?
Before you even begin designing your experience, it’s important to think about where you want your final piece to live so you can determine an appropriate size. Will this piece be standalone, or will it be embedded within your site? Once you answer this, you can better determine the size of your experience.
Standalone
When creating standalone experiences in Studio, you have the freedom to create whatever size experience you want. However, two common standalone layouts we use quite often are full bleed (think landing page/microsite/presentation) and more infographic-like (think tall and narrow).
If you want a full bleed experience where the content fills the screen and flows to the edges, we recommend 1280px width x 720px fold x whatever height you need. You can also set your Browser Scaling to “Full Width” to ensure that your experience fills the full width of any browser it’s opened on.
If you want a narrower experience that looks more like an infographic with a gutter on either side, we recommend an 800px width and a fold line of ~1200px, to create a vertical viewing area. As a general rule of thumb, we recommend keeping experiences under 30,000px tall to avoid any performance disruptions.
Embedded
If you are embedding an experience within your site, it’s important to know the dimensions of the iframe area it will be placed into so you can design with those constraints in mind. If you don’t know these dimensions, you can always ask your web team or use the Developer Tools in Google Chrome to determine the size. To figure out these dimensions in Google Chrome:
Navigate to a similar page on your site, right-click anywhere on the page, and select Inspect from the dropdown
Select the arrow icon and then hover over an area that is similar in size to where you will embed your experience
Dimensions should appear when you hover over the area. Use these dimensions as your canvas dimensions in Studio
One other thing to keep in mind before designing your experience is how you plan to import your content into Studio. When creating a new experience, you can start from a few different places. The first (and most common option) is to start from a blank canvas and pull in individual assets created from a design tool. You can export the assets individually from your design file and drag and drop them or copy and paste them right onto the canvas.
Another option is to import your entire design file (Photoshop, Illustrator, or Sketch) right into the Studio. This option can save you a ton of time, but there are some aspects of a design file that might not translate properly into Studio.
For a detailed explanation of this feature, please see our article on Ceros Import.
When designing in Photoshop
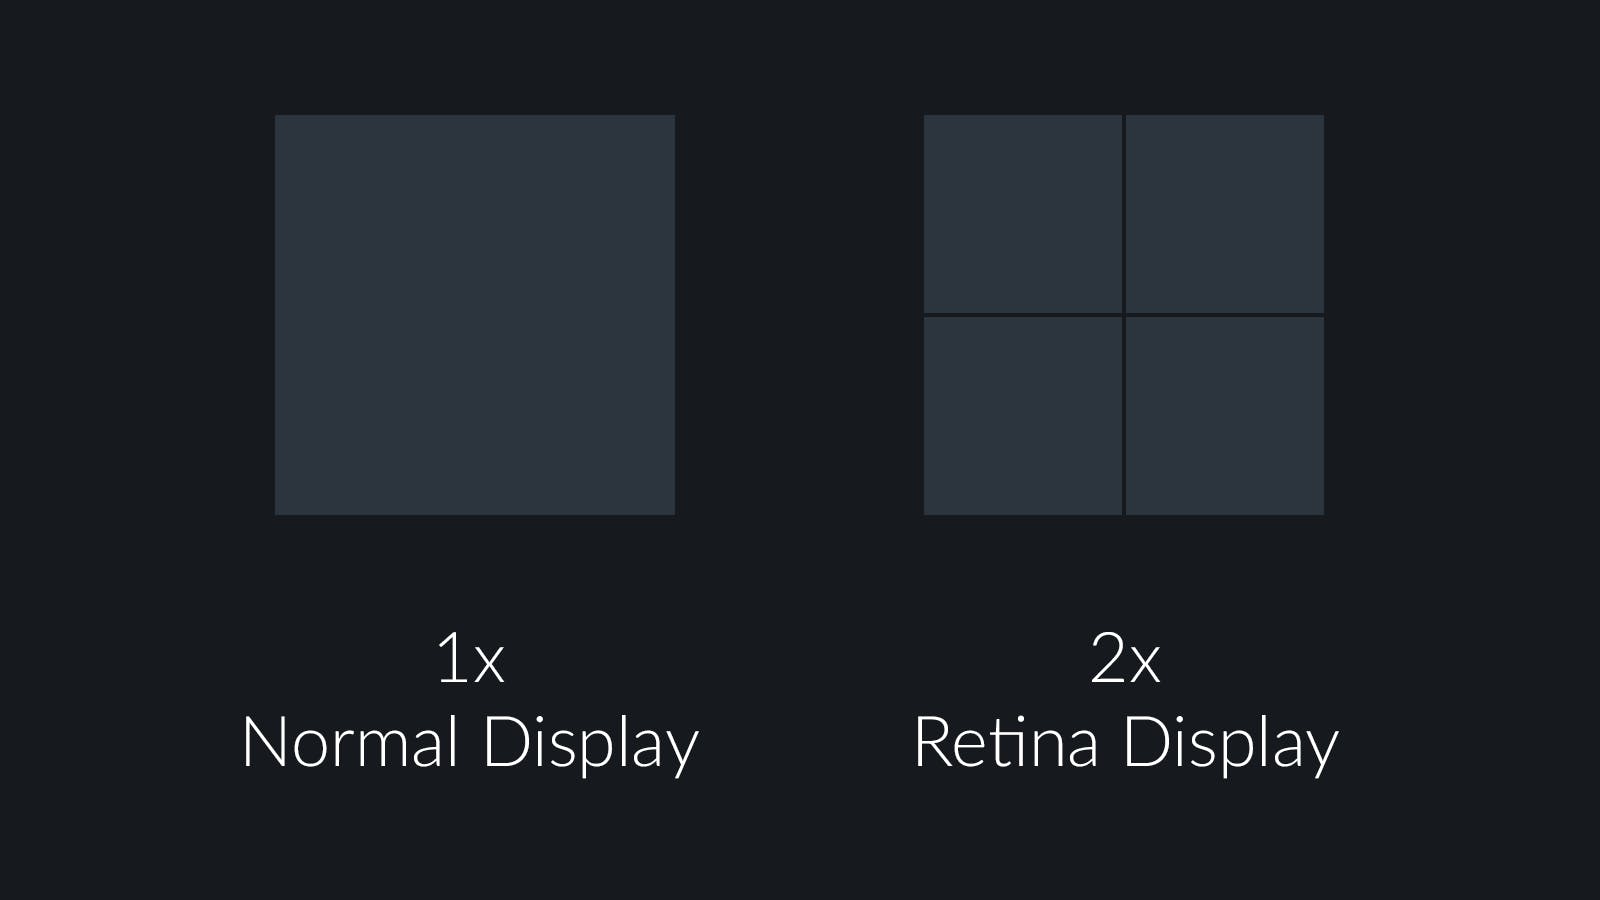
Photoshop is an incredible tool for creating your visions, which is why our entire Professional Services team uses it in combination with Studio. But before you set up your Photoshop canvas to match the dimensions you determined above, it’s important to know that Studio is automatically set up for Retina displays.
When you create your Photoshop canvas, you’ll want to ensure that you do so at double the dimensions of the Studio canvas (your resolution can stay at 72ppi).
Example:
If you determined your experience should be 1280px wide, you will need to set up your Photoshop canvas at 2560px wide.
If you would prefer to design at the actual size, you can do so by increasing your resolution to 144ppi.
Additionally, since Studio is intended to produce animated interactive content, you should design with that in mind by separating individual assets that will be the target of an interaction or that you intend to animate.
Example:
When animating a chart object, we would likely save each pie slice or bar object as a separate image so you can cascade them using animations.
When designing in Illustrator or Sketch
For Illustrator and Sketch, you can set up your design canvas to be the same size as your desired canvas dimensions in Studio.
Note: For best results, we suggest keeping your canvas under 1500px wide in Studio.
Exporting individual assets
If you choose the first method of exporting assets to import into Studio rather than importing a full design file, this section is for you! After you create your assets in Photoshop, Illustrator, or Sketch, you’re going to want to export the individual images/assets so you can bring them into Studio.
Note: You should export images from Illustrator at 2x.
Depending on your plans for the assets, you could do this in a few different ways. If you plan on animating the asset or having it be a part of an interaction, we recommend you export each object (or layer) as its own image file. We suggest that you use .jpg for all images that don’t require transparency and .png for any images that do.
Currently, Studio accepts most file formats, including (but not limited to) JPG, PNG, SVG, GIF, MOV, MPEG, MP4, and AVI. You can also copy and paste assets directly from a design tool, your browser, or your desktop onto your canvas.
Creating in Studio
After you’ve finished designing your assets, it’s time to create your experience! When creating in Studio, we recommend following this path:
Regardless of whether you choose to import a full design file or individual assets into Studio, we also recommend exporting a jpg of your entire design to use as a framework for placing everything on your design and then deleting the placeholder jpg once your assets have been arranged. (Think of this like an old-school color-by-number)
We also recommend that you create text elements in the Studio (rather than using image files of text) to ensure that the copy is crawlable by search engines. If you’re using a custom brand font, make sure to import your font file into Studio before importing your design so that you can use it in your experience. Using live text within Studio makes it easier to update in the future and hand it off to other team members if need be.
After you’ve created the layout of your experience, you can begin adding hotspots and interactions to your experience. In short, these hotspots are invisible clickable areas on the canvas that a user can interact with to trigger an action.
Finally, once you have your interactions set up and working correctly, you can then add the finishing touch of animations. These generally take the least amount of time in the production process.