In addition to being able to edit image properties like brightness, contrast, hue, and saturation, you can also use blending modes to obtain additional visual effects. And the best part is you can do it right here in Studio instead of jumping to a different design platform. Another powerful capability is you can animate assets that have Blending Modes applied to them, allowing you to create some exciting effects.
Image Blending Modes dictate how the pixels of one image interact with the pixels in another image, to create an entirely new visual effect. These effects are non-binding, so you can always change and adjust them however many times you’d like. Blending Modes can be applied to jpeg, pngs, and gifs. A ‘blend’ color is a combination of different color effects. When a blending mode is applied to an image, the ‘blend’ color modifies the ‘base’ color of each pixel in the image.

To add a blending mode, select an image that is above another asset. The blending mode options will populate under image editing in the Design tab of the Inspector Panel.
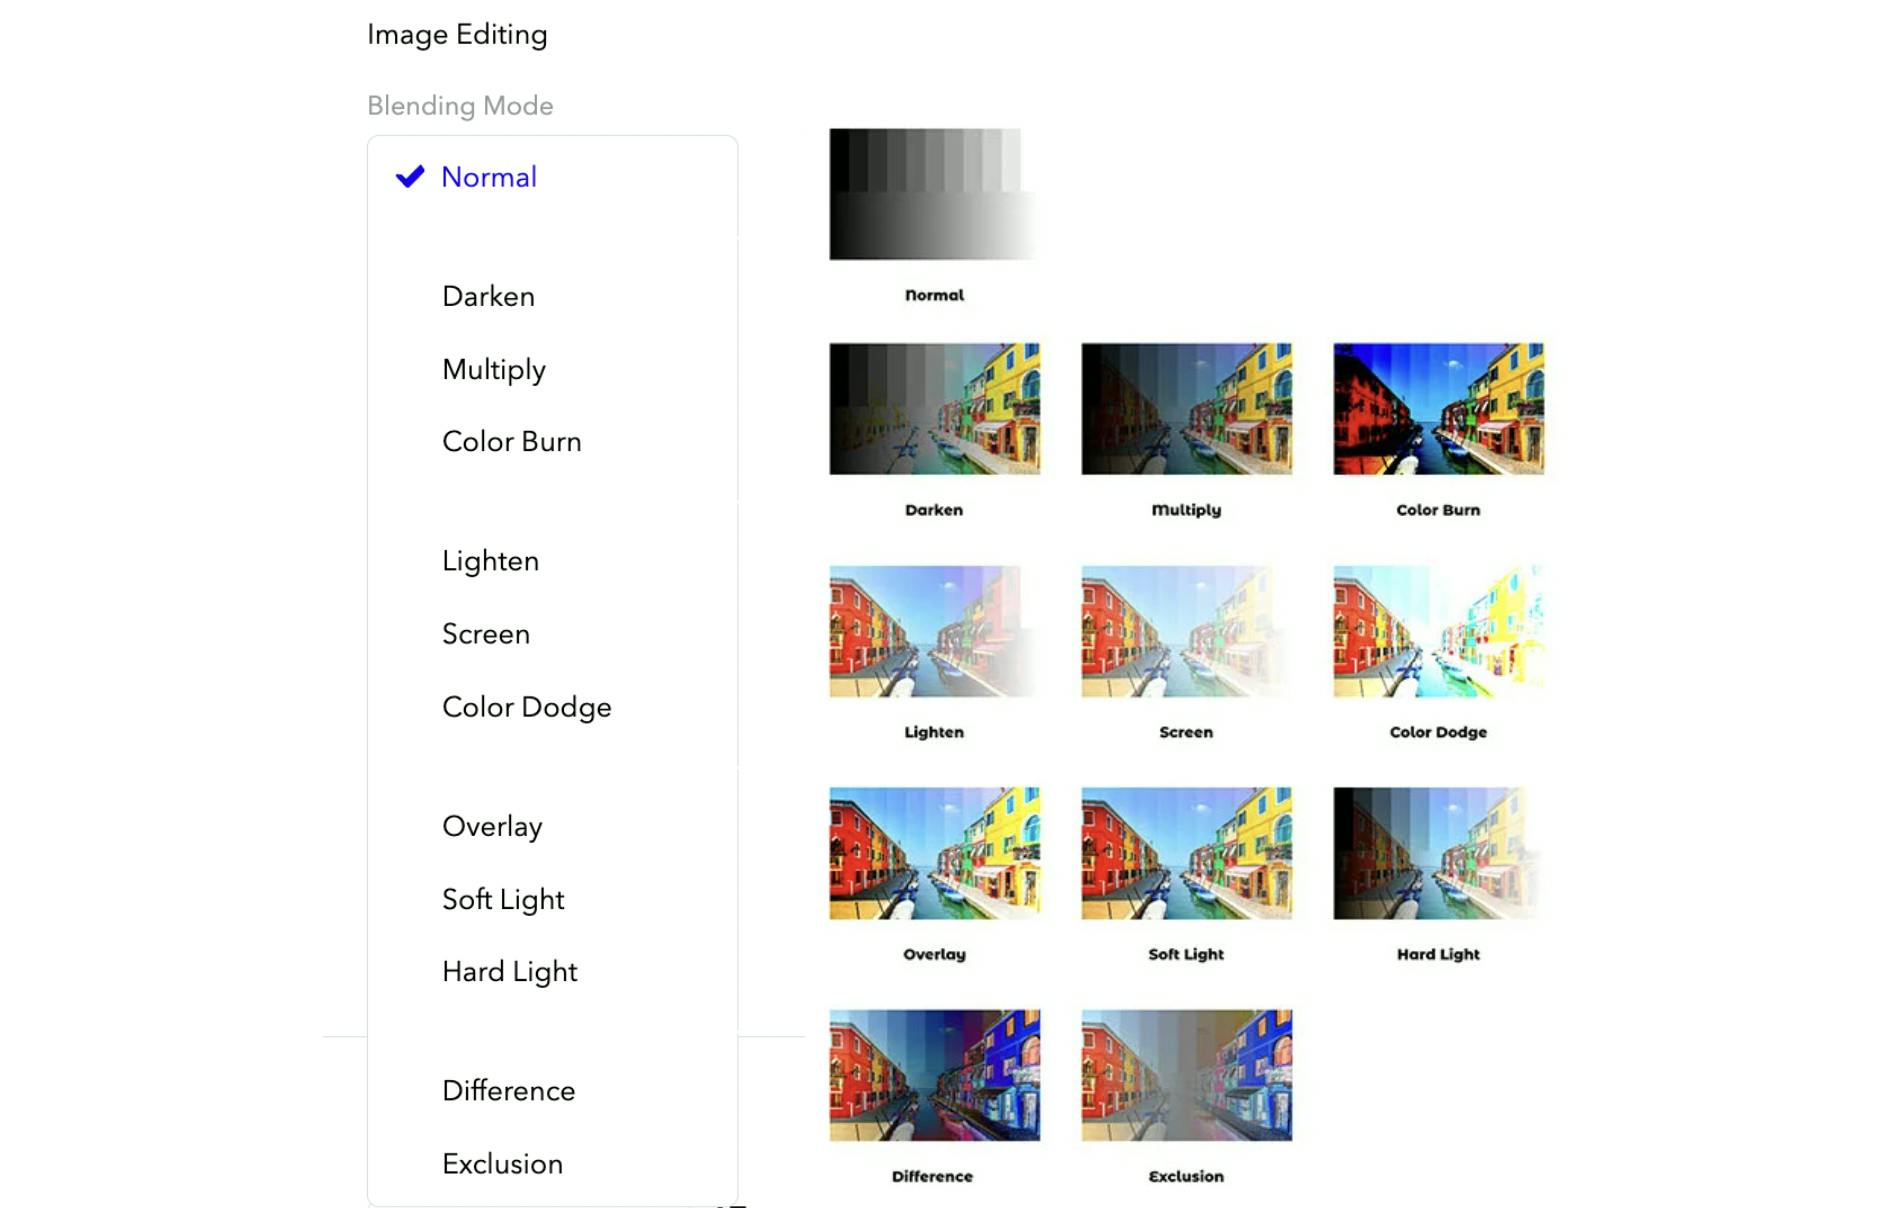
There are 12 Image Blending Modes that fall under 5 categories: Normal, Darken, Lighten, Contrast, and Inversion.

Normal: is the default mode applied to images. The pixels of the image do not blend with other pixels of images beneath them.
Darken Category (Darken, Multiply, and Color Burn):

Darken and Multiply both emphasize the darkest part of the image; these two modes differ in the way whites and midtones interact with other pixels. With the Darken Blend Mode, the whites and midtones become slightly transparent while they become totally transparent with the Multiply Blend Mode. Color Burn intensifies the saturation of the dark pixels while making the whites transparent.
Lighten Category (Lighten, Screen, and Color Dodge)

These Blend Modes are the exact opposite of the Darken Category Blend Modes. Lighten and Screen emphasize the lightest part of the image and the black and midtones become transparent. Color Dodge, in turn, intensifies the saturation and brightness of the whites and blacks become transparent.
Contrast Category (Overlay, Soft Light, and Hard Light)

These are a mix of the Darken and Lighten Blend Mode Categories. The brightness of whites increases, and the darks are emphasized.
Inversion Category (Difference and Exclude)

Difference and Exclusion Blending Modes invert the colors, these effects often look like a film negative.
**Note: Blending Modes are currently not compatible with Internet Explorer.
Adding Blending Modes to your images can help you create new visual effects. When you use Blending Modes in Ceros, it not only saves you the time it would take to jump back over into another design platform like Photoshop and apply the edits, but it also empowers you to create visual effects that can carry over to animated assets.


