Using the masking tool in Ceros, you can transform images and GIFs into virtually any shape you want! Masking assets directly in Ceros can streamline your workflow, so you’re not constantly jumping over to a design tool if you need to create an image mask. With the Ceros masking tool, you can leverage in-Studio shapes, PNGs, and SVGs, to mask JPEGs, PNGs, and GIFs.
Here’s how:
Place the image or GIF that you’d like to mask onto your Ceros canvas. We’ll refer to this asset as the original asset.
Layer a shape over the original asset on the canvas. This can be a standard shape (circle, square, triangle) from the Ceros shape tool, or a custom shape you’ve created using the Path tool. We’ll refer to this shape as our masking shape. You can also use PNG images and SVG Icons as masking objects as well—more on this below.
Select both the masking shape and original asset by holding down shift and clicking on both objects on the canvas or in your layers panel.
With both objects selected, right-click and select “Create Mask” from the right-click menu.
And that’s it! Your original asset will be cropped into the masking shape that you’ve applied. You’ll see that in your layers panel, these elements have become a “mask group”. Note that once your mask group is created, the masking shape must remain on top of the original asset.
If you’d like to edit the original asset, you can select it from the Mask Group in your layers panel. From here you can resize, rotate, or edit your image as needed.
As a Ceros user, there are a few things to keep in mind when masking images and GIFs in Studio:
Your masking shape cannot have any stroke applied to it.
Masking shapes cannot have shadows.
You are able to animate and interact with the Mask Group as a whole, however, you are unable to apply interactions and animations to the original asset and masking shape individually.
Only JPEGs, PNGs, and GIFs are supported as masked objects in Ceros—you cannot create video masks in Ceros.
Image Masking is not supported in IE 11.
Alpha Masking
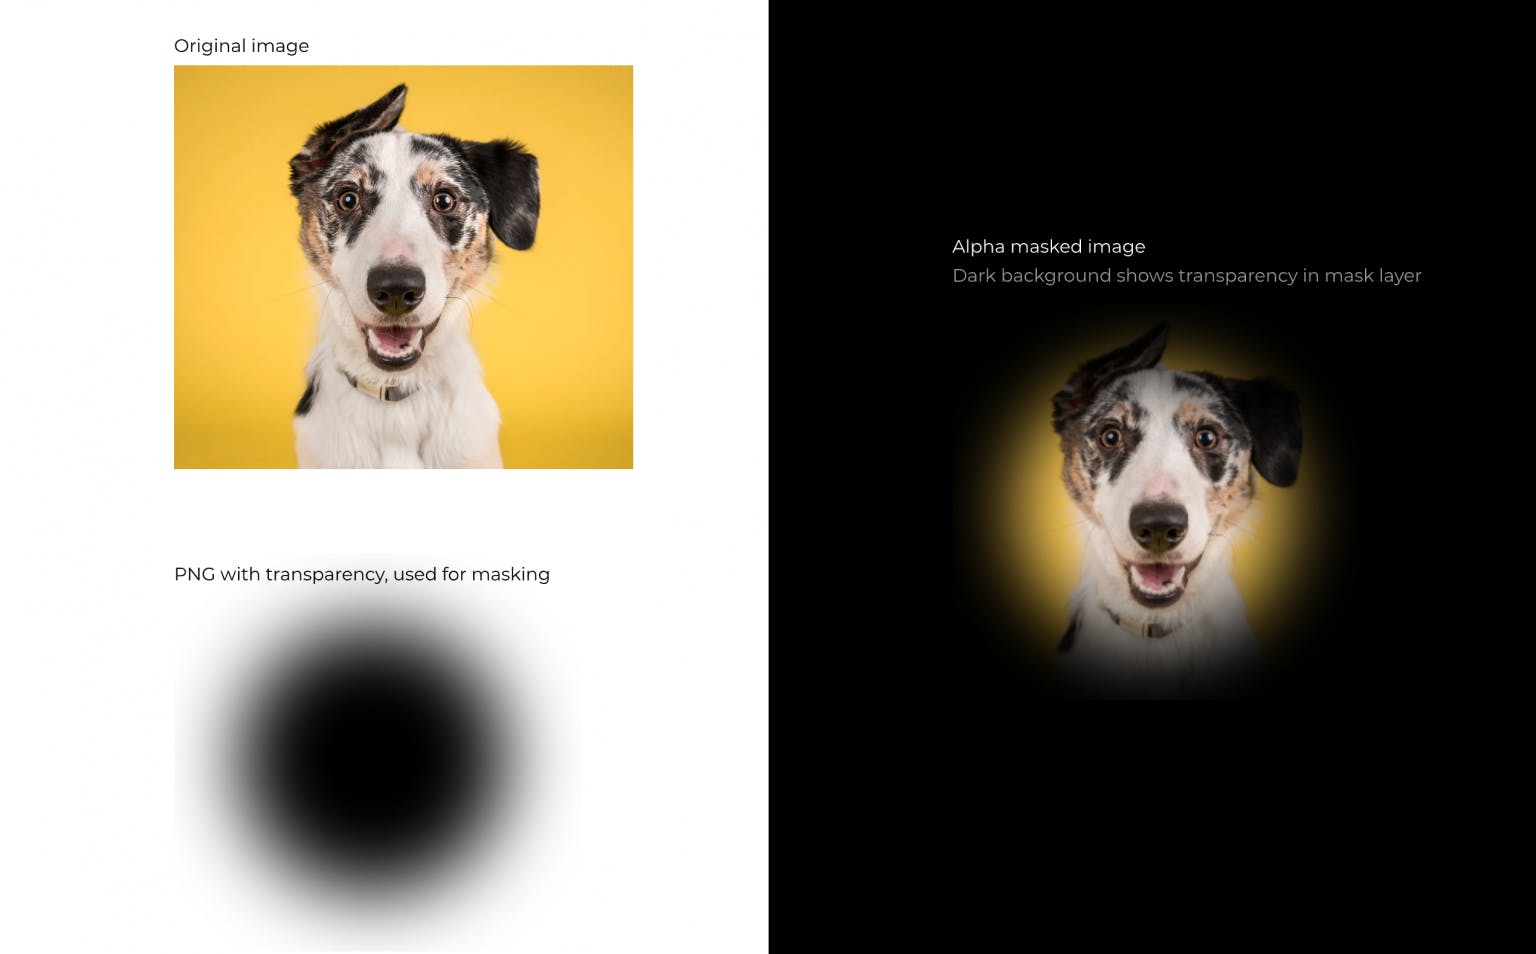
Alpha masks use a transparent PNG to mask an image. When creating an alpha mask, the transparent part of the PNG will be used for masking—so where the PNG is transparent, the masked image will not appear. Where the PNG is not transparent, the masked image will show. Translucent (semi-transparent) areas will show according to the level of transparency.

SVG/ Icon Masking
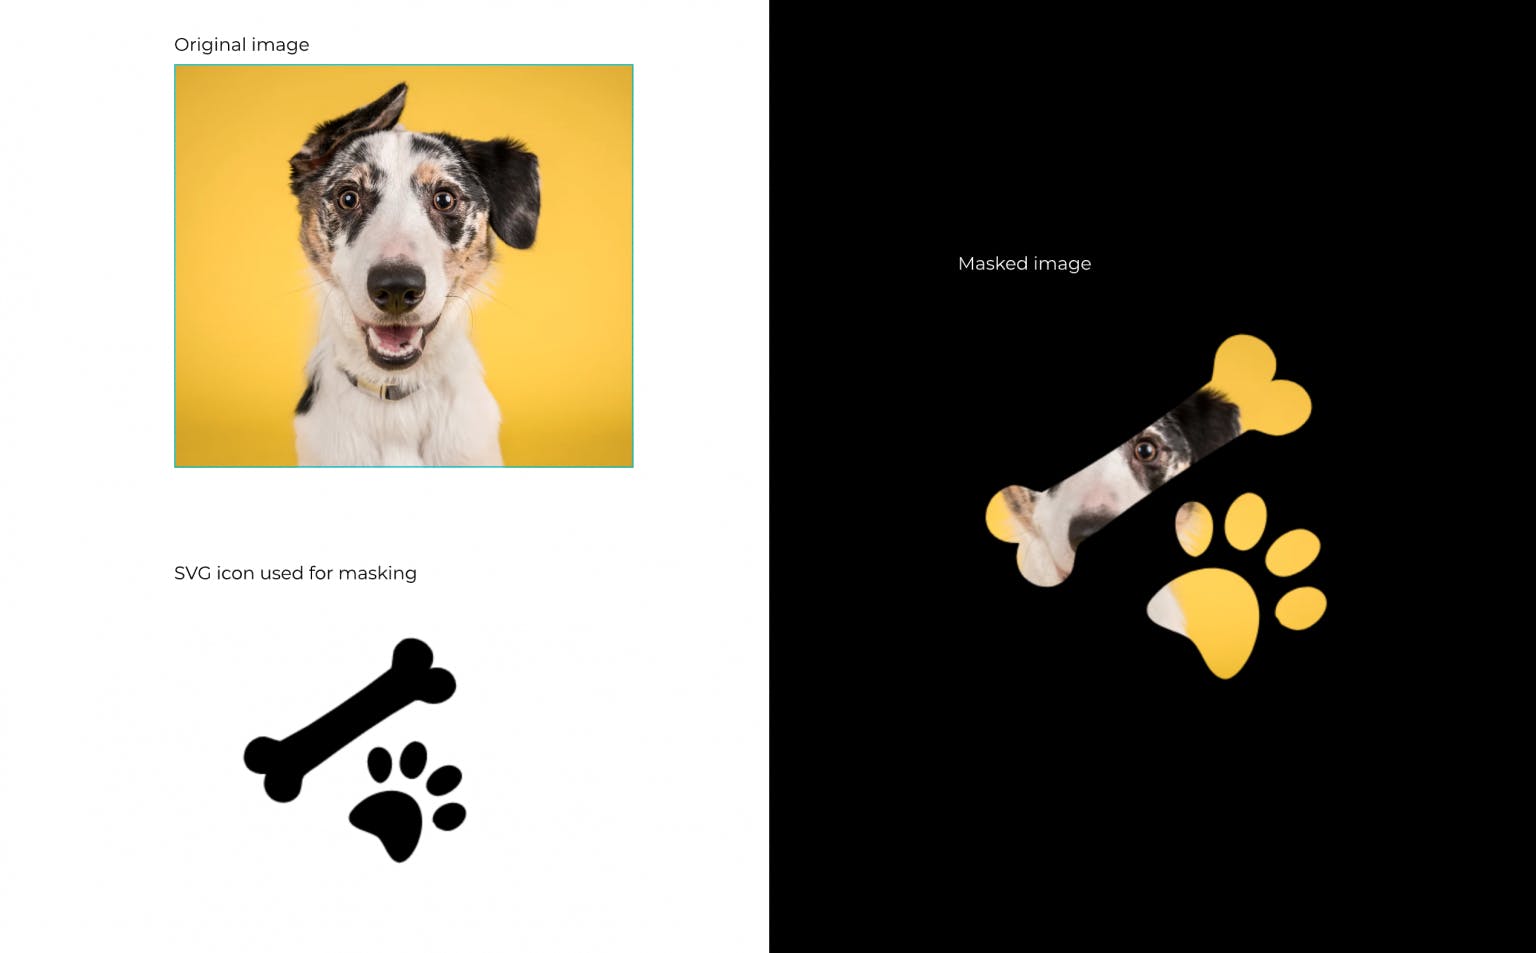
You can also use SVGs, including icons from the Noun Project integration, as masking objects. Simply import an SVG, or drag and drop an icon from the Noun Project integration onto the canvas. Layer the icon over the image you’d like to mask, select both, right-click, and choose “Create Mask.” This will mask your image to the shape of your icon.


